Need a new search?
If you didn't find what you were looking for, try a new search!
-
AuthorSearch Results
-
#26897 In reply to: MySQL sync job failing |
The codes you see in the HAast event log mean:
Result code 0 – This means the sync job was started successfully
Error code 5 – This means the sync job concluded normally, but not successfully – see exit code for more details
Exit code 3 – This means the sync task(s) failed due to a configuration issue (often credentials, sometimes environment, etc)The next step would be to enable debug logging for this job to capture more details. Please add/change the following line in the syncjob configuration file for FreePBX-MySQL:
freepbx-mysql/debug=onThen restart HAast and send us the debug log for this syncjob, located in the /var/tmp/haast folder. (If you don’t see this folder, it’s because you are using an older version of HAast. We try to follow the FHS standard for debug log location, which has evolved over time).
#26896Topic: MySQL sync job failing in forum Configuration & Optimization |My sync jobs are all running fine, but one job reports the following problem in the error log. What do the various codes mean, and what can I do about it?
Wed Dec 17 05:19:52 2025, D, 00015400, PeerLink Server, Connection 1: Executing command [clusterstatus]
Wed Dec 17 05:19:52 2025, D, 00015418, PeerLink Server, Remote request for cluster status accepted
Wed Dec 17 05:19:53 2025, D, 00005725, System Command, Warning during interface with database sync for syncjob ID ‘freepbx-mysql’. Result code ‘0’; Error code ‘5’; Exit code ‘3’. Check debug log for further details#22526 In reply to: How do I install the Dongle Server |First, plug the Dongle Server into your network and it will receive an address via DHCP. Browse to this address to configure a static IP (recommended) in the Dongle Server. There are other optional parameters to configure, but for now this is enough to get started.
Next you must download the SEH UTN Manager installation files which can be found on the SEH Computertechnik GmbH website:
https://www.seh-technology.com/services/downloads.htmlThere are 3 packages you must download (you do not need to install the GUI manager), matching your Linux distro:
1) driver
2) service (SEH UTN service/daemon)
3) clitool (command line interface tool ‘utnm’)We recommend you download these files to the /usr/src/seh directory. Next open a terminal window and install the packages as follows (instructions assume Red Hat family OS):
1. Install the headers for your kernel:
sudo yum install kernel-devel-uname -r
2. Verify, that the version numbers of kernel and headers match exactly:
Kernel: uname -r
Header: sudo yum list | grep kernel-headers
3. Change to the /usr/src/seh directory
cd /usr/src
5. Install the SEH UTN Manager packages (repeat for each package downloaded):
sudo yum install <full package name>
6. Add all users that are to administrate the SEH UTN Manager on the client to the user group ‘utnusers’. To do this, open a Terminal and enter the command:
sudo usermod -aG utnusers <username>
Note that if you plan to operate solely as root, this step is optional
7. Logout and login again so that the group changes take effect.Next plug the Telium USB dongle into the dongle server port 1, and from the linux host issue the following command (using your dongle server’s IP address):
utnm -c “getlist 1.2.3.4”
You should see something like the output below.
Port VID PID Manufacturer Product
—- —— —— —————————– —————————–
1 0x0471 0x485e Senselock Elite4 5.xPort State Owner Class Port name
—- ————— ————————- —– ————————-
1 Not activated server1 0x03 test dongleNext you need to connect the dongle in the Dongle Server to the host (SEH calls this “activation”). The following command will connect the host to the device in the Dongle Server’s port 1 :
utnm -c “activate 1.2.3.4 1”
And finally, confirm that your host sees the dongle server as expected:
lsusb
Bus 006 Device 013: ID 0471:485e Philips (or NXP) Elite4 5.xNext, you should set the dongle to re-connect automatically in case of network outage or other problems:
utnm -c “set autoconnect=true 1.2.3.4 1”At this point you can begin using the dongle as if were plugged into the local host. There are many more options available to configure the dongle server, as well as the host connection. Telium may advise on other settings to suit your environment, but in general if you don’t understand a setting don’t experiment. The defaults work quite well.
Note that Telium may recommend changing other settings in the Dongle Server, but Telium must have detailed information on your network topology, hosts, etc. As well, Telium can only offer such recommendations and offer support to Dongle Servers purchased directly from Telium.
If you wish to review the dongle server documentation (for Linux) please see:
https://www.seh-technology.com/fileadmin/user/downloads/dongleserver/documentation/dongleserver_UM11_Linux_en.pdf#17258 In reply to: Settings and data not synchronizing between cluster nodes |HAast has changed considerably since version 2.1. Did you remember to copy over the sync job definitions (probably from /etc/xdf/telium/haast.conf.d ) As for the event handlers (probably post-sync), we recommend that you use nodeprep to ensure data is properly updated and reconciled once it reaches the other node. Most event handlers are a single line of code: e.g. “nodeprep -a 1200”
If you don’t have nodeprep installed (if you pieced together a cluster from old and new software), please email us and we will provide you with the missing software and sample event handlers.
#17191 In reply to: Withstanding penetration testing |If your cluster needs to withstand penetration testing (or the equivalent of exposing the management ports to the internet), then there are a number of steps you must take to harden your cluster.
1. Ensure you set complex id and passwords for the Asterisk management interface.
2. Set the Asterisk management interface to listen to localhost only.
3. Ensure you set complex credentials for HAast peerlink.
4. Protect the HAast GUI (https) interface with the htpasswd utility
5. Ensure you set complex credentials for rsync.
6. Ensure you set complex credentials for database(s) in use.
7. Limit database port access to localhost and the remote peer.
8. Set iptables rules to further limit interface/port combinations of the above to the peer and any trusted management workstations.
9. Set iptables connection rate rules to the max necessary for your cluster to operate.The HAast GUI and ReST interface can be disabled altogether if you do not need that functionality. Note that the GUI and ReST interfaces do not use ANY 3rd party libraries; it is all hand coded in PHP and tested for stability and security. However, it is possible to overload or find a weakness in Apache HTTPD; in which case disabling the GUI and ReST interface is recommended.
If you do not need direct access to the HAast telnet interface, then you should set the HAast telnet interface to listen to the localhost address only. Once that change is made, you must SSH to the node first and then telnet to HAast in order to access the interface.
HAast is designed to support even the most heavily loaded systems. However, HAast on it’s own is not designed to withstand loads/connection attempts beyond what can be found in a normal production environment. In other words, HAast is not meant to withstand the challenges of penetration testing or open internet access without first hardening the cluster. The above hardening recommendations do add additional load to the cluster nodes, so in general we do not recommend implementing the above unless you have a real need to harden your cluster.
#17020 In reply to: How to activate / request a license |If you have chosen USB Dongle activation, then there a few more steps required to pair your new dongle with your license. Once your dongle arrives plug it into the computer and restart the HAast service. Reconnect to the product’s telnet interface and issue the “license usbdongle” command. For example:
[root@pbx_qa_17:/usr/local/haast] $ telnet 172.31.224.14 3001

Trying 172.31.224.14…

Connected to 172.31.254.14.

Escape character is ‘^]’.

HAast telnet interface on ‘PBX QA 17’

HAast>license usbdongle

  Your USB dongle has been detected but is not yet paired with your license.

  To pair your USB dongle with your license send the following dongle ID to

  support@telium.io to receive a pairing code :

    5010-5473-C839-94B9
Copy the pairing code and paste it into an email to support@telium.io and include your license number. We will reply with an activation code that you must enter. For example:
  When ready enter the pairing code below (or . to abort)

  activation code>46A9-9907-43DB-4F06


  Your activation code has been accepted.  Please restart the HAast service to use the activated license.
Now exit the telnet session and restart the HAast service. HAast will restart fully licensed and you are ready to use your licensed product. You can also verify the license by repeating the “license usbdongle” command, and it should indicate that the dongle has been paired to your license. For example
[root@pbxqa17:/usr/local/haast] $ telnet 172.31.224.14 3001

Trying 172.31.224.14…

Connected to 172.31.224.14.

Escape character is ‘^]’.

HAast telnet interface on ‘PBX QA 17’

HAast>license usbdongle

  Serial number: 3040504215618650775

  Paired: yes, on Tue Jun 14 17:52:40 2022 EDT

  Locked out: no

HAast>
#16546 In reply to: Encryption of config file passwords |There are a few ways to address your problem.
First, you can limit access to the HAAst config files (or even entire /etc/xdg/telium directory) so that only the root user can read them. Using the chmod command will allow you to set these files to readonly (r – -) for root:
chmod 400 haast.confSecond, you can also encrypt the password before placing it into the config file. For example, using md5sum we can generate a hash of your obvious password:
[root@qa14 dev]# echo "MyObviousPassword" | md5sum
7f1e7328e9c668dbc73485eecd91b7ba -
Then you would use 7f1e7328e9c668dbc73485eecd91b7ba as your password entered into the haast.conf file on both nodes.
Third, you can store sensitive config file information in the HAast keychain. To use a keychain value in a configuration item simply replace the value with @KEYNAME. Applicable configuration items show @KEYNAME as an option in the documentation. Note that a KEYNAME can contain only letters, numbers, and underscore, and case of the letters is ignored. See section 3.1 of the installation guide (as of Jan 2021) for further details of the keychain.
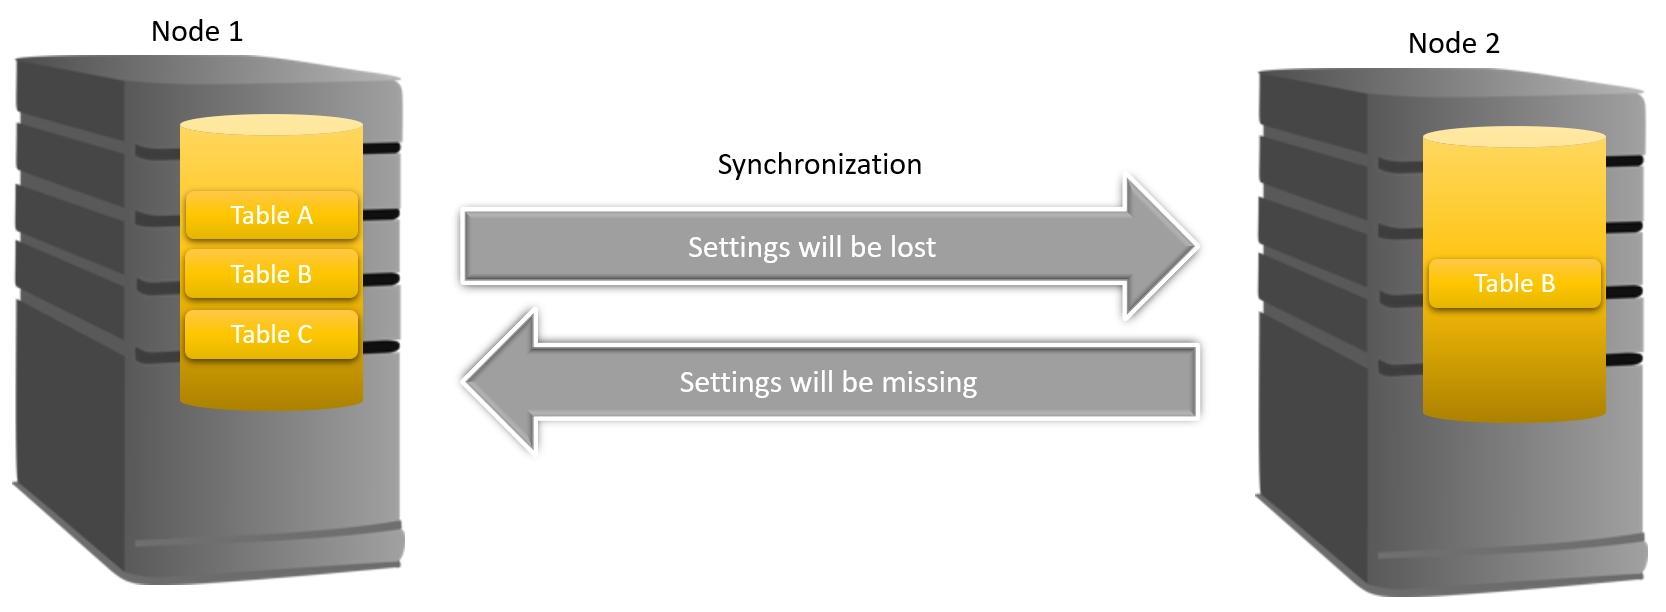
#16504 In reply to: Configuring second FreePBX node using HAAst sync |No! Unlike most of the other configuration generators, FreePBX does something a little unusual. Every time you add a module (or even upgrade a module) to your system FreePBX might change the structure of the database / add tables to hold the additional data.
So if you now sync from your primary node to your secondary node, settings would be lost because the associated tables/fields are missing on the secondary node. Conversely, if you now sync from your secondary node to your primary node, settings would be missing because the necessary source settings are absent. (See image below). This is why the HAAst installation guide and maintenance manual provide specific installation/upgrade instructions relating to FreePBX. Every year we have at least one customer that damages their FreePBX cluster because they did not follow the installation/maintenance guides.
Similarly, updating a module might change table structure, and that’s why we say to disable any automatic updates in FreePBX. Most other configuration generators are smart enough to detect a configuration mismatch between versions/modules, but FreePBX does not and will probably break (dialplan failure) unless the two nodes are kept identical (in terms of modules enabled/installed/versions).
Even if HAAst were to copy the metadata (table structure) as well, you would still have problems since the PHP code which makes up FreePBX will not understand the settings (if the code version doesn’t match the settings version). This may result in the PBX failing to process calls as the dialplan crashes, and/or failure to configure, and/or failing to complete an APPLY button push.
To read more about how to properly setup your nodes with FreePBX see sections 3.6 and 10.1.5 of the Detailed Installation Guide, and sections 7 and 8 of the Maintenance and Operations Guide.
If you have already corrupted your FreePBX setup and your cluster won’t process calls (due to dialplan fialure) see this forum post
#14370 In reply to: Delay HAAst start on bootup |Since Red Hat 8 uses SystemD, the best way to delay HAAst start is with a service timer. Create the file haast.timer in the /etc/systemd/system directory with the following contents
[Unit]
Description=Delay HAAst start by 1 minute on bootup

[Timer]
OnBootSec=1min
Unit=haast.service

[Install]
WantedBy=basic.target
Then, enable the HAAst timer and disable the service:
systemctl enable haast.timer
systemctl disable haast.service
And finally, in your haast.service file change the WantedBy line to read:
[Install]
WantedBy=haast.timer
Next inform systemd of your changes:
systemctl daemon-reloadAnd your HAAst start will delay by 1 minute on bootup. You can adjust the delay as you need.
#14334Topic: Qt_5 not defined in forum Installation & Upgrade |I have installed Secast on Ubuntu 18.04 with Qt5 library version 5.9.5
When I attempt to start SecAst with
/usr/local/secast/secast –fI see the following error
SecAst version 1.7.0 started under PID 28484
/usr/local/secast/secast: relocation error: /usr/local/secast/secast: symbol _ZdlPvm version Qt_5 not defined in file libQt5Core.so.5 with link time reference
What is wrong?
#6857 In reply to: Constant failover |Your replacement systemd file solved my problem. I found discussions on the Digium forum about the parameters (used in the Digium provided service file) and causing slow Asterisk start. I also found this link https://community.asterisk.org/t/solved-centos-7-compatible-init-d-or-systemd-script-for-asterisk-13/66359/2 which makes reference to the same.
I noticed your recommended SystemD service file also removes the restart parameter, which I realize makes perfect sense since HAAst should be controlling starts/stops of Asterisk, not systemd.
#6856 In reply to: Constant failover |If the Asterisk control file (wrapper) is exiting with code 3, that means Asterisk is taking too long to start. I recommend you disable the HAAst service and manually try to start the Asterisk service directly.
I suspect you will see a long and slow (or errored) start of Asterisk. The systemd service file included with Asterisk is not ideal for cluster use and can cause slow startup. If you are using systemd please try the service file offered by Telium here:
https://telium.io/topic/cant-start-asterisk-exit-code-158/
-
This reply was modified 6 years, 6 months ago by
WebMaster.
#6596Topic: Constant failover in forum Configuration & Optimization |I have setup a new cluster, and notice that the nodes are failing over back and forth non-stop. I saw the forum topic about misconfigured network settings in HAAst, but I confirmed they are correct.
One clue I see in the HAAst log file is that the Asterisk wrapper start is exiting with error code 3. What does that mean?
#6855 In reply to: USB license on Hyper-V guest |Telium has certified hardware which enables USB dongles to connect over the network (“USB-over-IP”). This allows USB dongles to be plugged into one device on the network and appear local to another device (physical computer/virtual machine/container).
CoolGear USB-NET-4A USB over IP hub
The USB-NET-4A is available directly from CoolGear here: https://www.coolgear.com/product/usb-2-0-over-ip-network-4-port-hub-share-any-usb-device-over-tcpip-network or from Telium. This device is suitable for small and simple networks, and provides a budget dongle over IP solution. This device supports up to 4 dongles. Note that Telium maintains its own Linux driver for this device, which is locked to the MAC addresses of the devices sold through Telium. Telium does not make this driver available for devices purchased from other sources. To acquire the Linux driver for a USB-NET-4A purchased from other retailers, please contact CoolGear directly. This unit has completed long-term testing and has received Telium certification.

DongleServer from SEH Technology
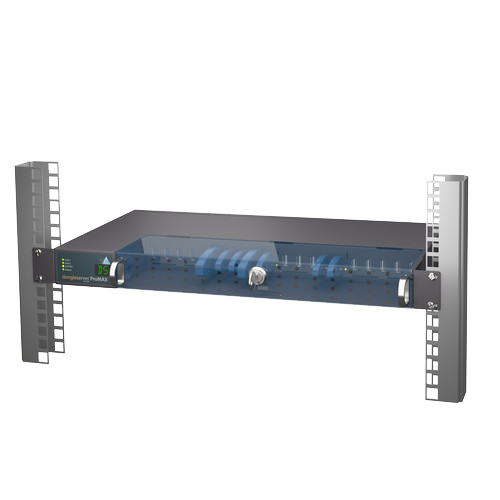
The DongleServer Pro/Max has passed preliminary testing with Telium. For more information visit https://www.seh-technology.com/products/usb-dongleserver.html. This device is suitable for 4 to 20 dongles (per DongleServer), and offers a greater number of management and control options. The smaller device (4 dongles) and larger device (20 dongles) function identically, and full Linux support is available from the manufacturer. Telium has an optional stability feature which allows survival of a failed/hung SEH dongle server as noted below. If the unit is purchased through Telium then Telium will include support (and setup assistance) for these devices within the included support incidents, as well as the remote dongle stability feature. This unit is currently undergoing long-term testing and has received provisional Telium certification.
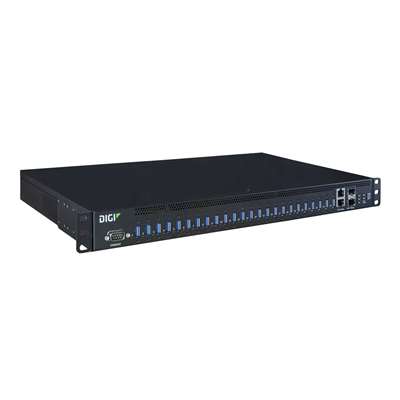
Digi AnywhereUSB 2/8/24 Plus
The Digi AnywhereUSB has passed preliminary testing with Telium. For more information visit https://hub.digi.com/support/products/infrastructure-management/. These devices are suitable for 2, 8, or 24 dongles (per Digi device). If the unit is purchased through Telium then Telium will include support (and setup assistance) for these devices within the included support incidents, as well as the remote dongle stability feature. Note that this unit is not yet available through Telium as it has NOT completed long-term tests, nor received Telium certification. Use this device for non-production purposes only until Telium has completed certification. Update: We have received reports that the 2 port model is underpowered and times out during configuration and when accessing the USB devices, so we suggest 8 port minimum.
If any product is purchased from Telium then we include support for the device as described in FAQ 1075. If you chose to purchase the device elsewhere then we cannot answer any questions about the devices’ functionality, compatibility, drivers, etc. (Please direct those questions to your retailer of choice). Please ensure your design considers compatibility between all software/firmware/hardware in your project as Telium is not responsible for third party devices or vendors.Please note that using a remote USB dongle (software or hardware based remoting) requires a feature be enabled in your License. This will cause the Telium software to tolerate loss of the USB dongle (or freeze/hang of the dongle server) and then initiate a reconnection or restart of the dongle. It also allows the Telium software to reinitialize the remote dongle to force a reconnect (as often required if the dongle become unresponsive, etc). This license feature also disables a type of hacking/fraudulent dongle detection in the security library used by Telium software, so the feature is limited to select channel partners only. If you do not qualify for this feature then Telium recommends checking if a Volume License Server (VLS) is a viable option for your deployment.
#6854 In reply to: Max calls in Free Edition |The Free Edition is more for testing compatibility and basic functionality. It’s also (surprisingly) popular with small office / home office installations. It’s not meant to be a platform for capacity testing / full load testing.
We do offer a full-featured trial (Commercial Unlimited edition) for larger installations, see our FAQ at https://telium.io/faq1001 for more details.
UPDATE: As of August 2020 we now off subscriptions (monthly or annual) which might need your needs. It can be cheaper if you just want a quick trial but don’t plan to buy. (If you plan to buy then the trial edition may be cheaper)
If you want to contact sales@telium.io they can help you get started with a full-featured trial.
-
This reply was modified 6 years, 5 months ago by
-
This reply was modified 6 years, 6 months ago by
-
AuthorSearch Results